To keep my promise of posting more, let me start with sharing something I had issues with a while ago, and that is getting your sprite animation to play (and honestly even show!) when they are part of your canvas (e.g. you want to add little animations to your tutorial overlay).
Once you know how it’s done, it’s very easy and quick!
I found multiple answers to this online, but no in depth step-by-step guide, so I want to provide one 🙂
So if you’re an impatient dummy like me that sometimes gets overwhelmed by stuff like this and wants every step laid out because the meagre 3 sentences provided in the Unity forum left you stuck, you’ve come to the right place ^^
I made the important bits bold for people who know the general stuff and added more explanation inbetween.
Note that I’m also including how to turn an After Effects animation into a spritesheet, so if you’re not interested in that and already have a spritesheet, scroll down to 3. Unity Integration!
In a nutshell for the truly impatient ones:
1. Drag Spritesheet into scene and go through save dialogue to create an anim file + controller
2. Move created Game Object into canvas but replace the Spritesheet script with an Image (UI) script
(drag first frame of spritesheet into Image script public value)
3. Open the created anim file inside of the Animation window, and delete the existing frames
4. In the Project window, open the spritesheet, mark all the frames and drag them into the .anim file
(visible in the animation window)
5. This has nothing to do with the original issue, but also make sure the Sample Rate is the same as the frame rate you’ve used in After Effects or whereever.
1. After Effects animation to single PNGs
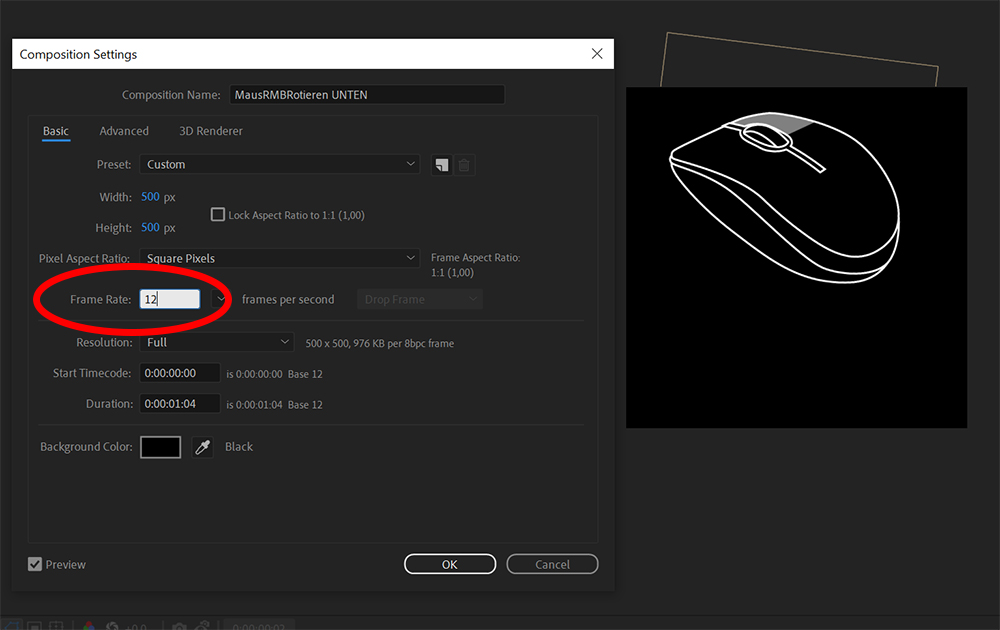
I’m going to assume you know your way a little around After Effects, if not, there are wonderful tutorials all over Youtube! In this example, I have a little explanatory animation on how to move the camera with your mouse. I’d recommend 12 FPS for such animations, as it significantly helps to keep down the size of the spritesheet, and frankly you don’t really need more. (Right click on the composition -> Composition Settings, where you can set 12 as the frame rate)
Try to make the amount of your frames divided by integral numbers to use all the space of the spritesheet (wow, this just became unecessarily nerdy with all that math stuff! 😉
What I mean is, e.g. 15 Frames = 3×5, or 9 Frames = 3×3, 12 = 3×4… you get the idea :))
For the sake of completeness if you’re new to game development, or have forgotten, or whatever:
Sprite Sheets don’t have to be a square, the frames of it need to though (aka the width and height of your composition needs to be the same size)
Next add your composition to the Render Queue. Doesn’t have to be the Media Encoder Queue.
That dummy is annoying anyway 🙂
Select your composition, then Composition -> Add to Render Queue.
Head to the Render Queue (usually at the bottom , conveniently called “Render Queue”, if it’s not there, it can be found under “Window”, fairly at the bottom of the list)
Next where it says Output Model, click on the words “High Quality” (it could also say something else)
and then for Format choose PNG Sequence and for the channels RGB + Alpha.
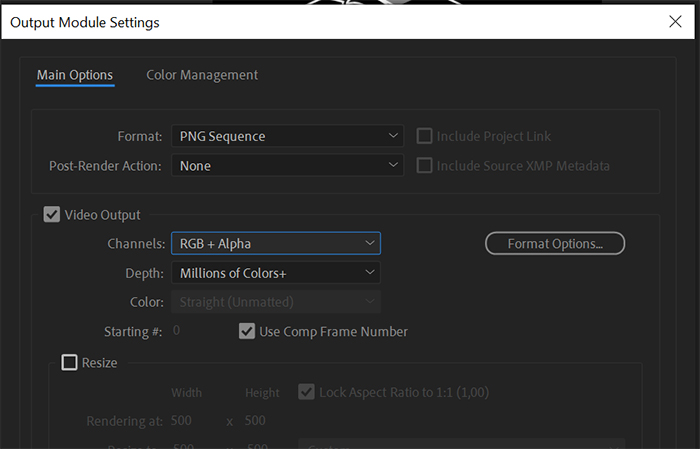
Choose the File Destination inside of the Render Queue Window (a folder will be created at the path that you choose) and hit Render.
2. Combining PNGs into a Spritesheet
Now that we have our beautiful PNGs, we need to turn them into a single Spritesheet.
I do this with a little help of this neat little software called GlueIT,
you can download it here: https://github.com/Kavex/GlueIT (click on the green Button “Code” and then “Download ZIP”)
I will explain how it works, it’s fairly simple and straightforward, if for some reason this doesn’t exist anymore or you cannot download it, don’t fret, there’s so many freeware for tasks like these, just google “combine PNG into Spritesheet” “Spritesheet Generator” or something like that and maybe watch a short video on youtube if it isn’t self explanatory as is. This is how I found GlueIT 🙂
Open GlueIT and click on Add to insert single frames. Navigate to the path we exported the PNG Sequence before and shift select (or crtl+A since there is nothing else in the folder) all our frames.
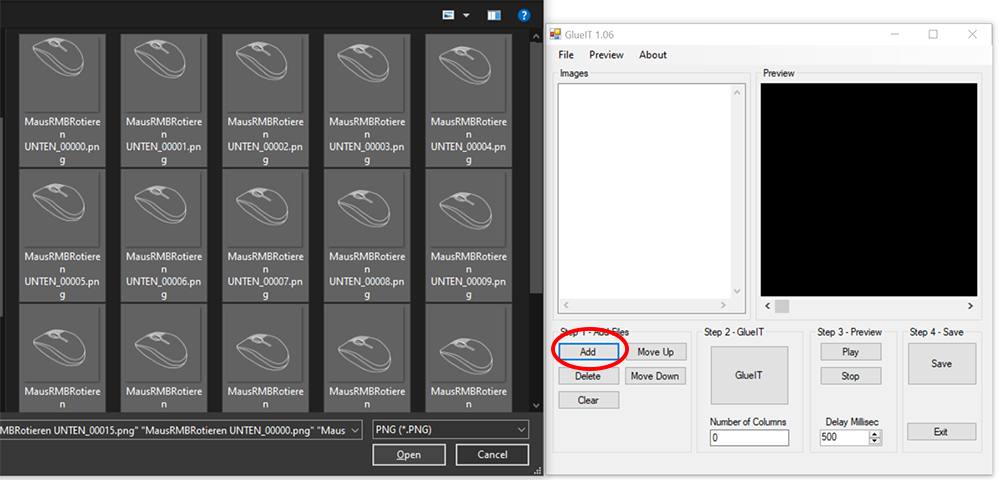
Now we need a tiny bit of math, your elementary teacher was right, this stuff IS useful later on 😉
what I said before about picking a number of frames that can be divided to avoid wasting precious space on the spritesheet also comes into play 🙂
I personally prefer landscape layout to portrait for spritesheets, so if you’re like me, add the bigger number into “Number of Colums”.
I have 15 PNGS aka frames, so 15 = 3×5, therefore, I type in 5 and hit the big “GlueIT” Button.
This generates the spritesheet and opens a little (incorrect, because cut and not showing all the rows) preview.
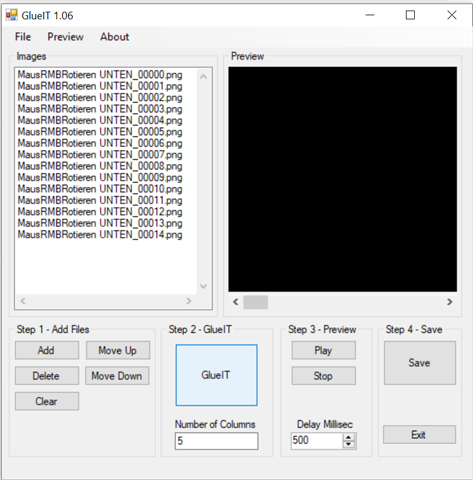
Close the preview and click on Save to, you guessed it, save the spritesheet (I personally prefer directly into the Unity Project)
And we’re done! Off to Unity!
3. Unity Integration
Hello again to the people who skipped the first part! Let me start with mentioning my sponsor…
just kidding.
First, turn the PNG into a sprite sheet with the import settings:
Choose Sprite (2D and UI) and set the Sprite Mode to Multiple and click apply.
Then click on sprite Editor (if it says it’s not installed, open the Package Manager (Window -> Package Manager) at the top instead of “My Assets” or “In Project” switch to “Packages: Unity Registry” and download the 2D Sprite Package)
In the Sprite editor open the Slice Menu and either choose Grid by Cell Size (the size of a single frame) or Grid by Cell count (number of row and columns, and I always prefer this, because I forget numbers/sizes like an idiot)
Then click on Slice, and afterwards on Apply.
Drag the now converted sprite sheet from the project window into the Scene Window to create all the necessary files.
This will open a safe as window, where you can name the animation, saving will create an anim file and an animation controller. Afterwards you also have the sprite animation inside of your scene. Note that this does not work inside of the canvas, which is probably why you are here reading this.
The game object inside the scene doesn’t work when you drag it into the canvas, because SpriteRenderers don’t work for the Canvas. You need an image (UI Element) for that.
To save time, drag the created Game Object into the canvas instead of creating a new one.
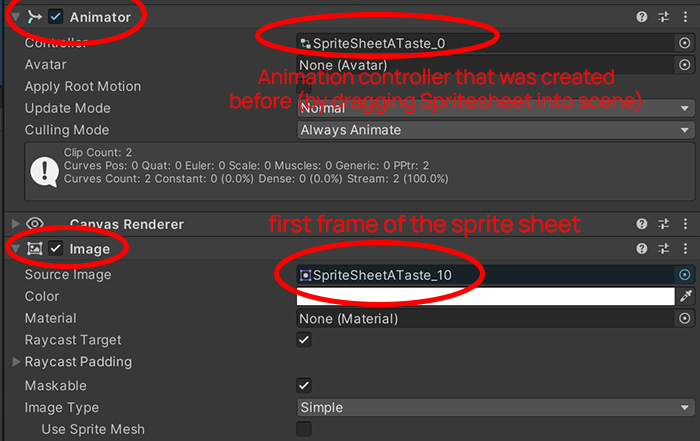
In the Inspector, remove the SpriteRenderer Script from the Game Object and add the Image script instead. Choose the first frame from your spritesheet as file for the image.
If you made a new game object, add an animator and drag the created Animation controller in there.
You don’t need to do this if you changed the game object, as it already has the animator with the required controller.
Drag the Project window next to the hierachy (or anywhere so you can see both “Animation” and “Project” simultaneously) for easier access for the next steps. you will need to drag stuff from the project window into the animation window which doesn’t work great when they’re next to each other.
Open the created anim file inside the Animation window (Found under Window -> Animation)
by clicking on it in the project window.

Notice that now there’s a yellow error message that says “Sprite (Missing!)”. This is fine.

🙂 For real though, this means we’re on the right track.
Now we just need to replace those burning keyframes with working ones.
In the Animation window,
select all the keyframes by dragging a marquee rectangle over them and hit delete.
Now open the Spritesheet inside the Project so you can see all the frames, mark all the frames and drag them into the animation window.
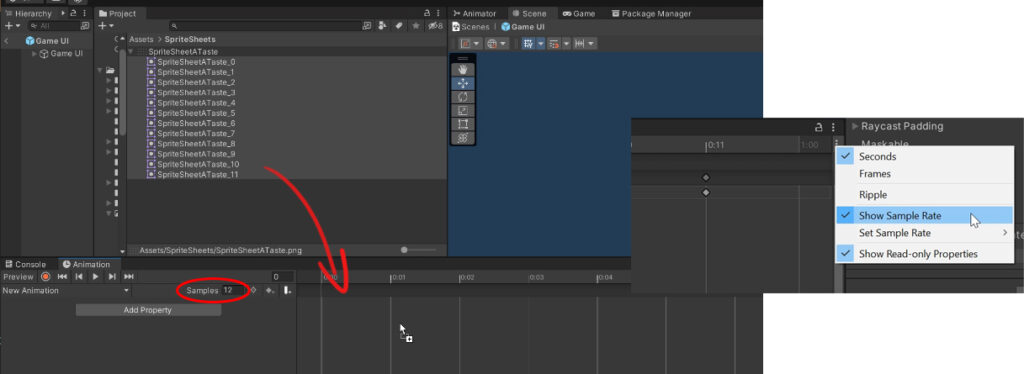
Also make sure where it says “Samples”, this amount is set to 12 (or whatever the frame rate you set in After effects. If you don’t see “Samples,” click on the (lower) three dots right at the upper right corner of the Animation window and activate “Show sample rate”.
Aaaaand you're done!
If you click on the Play Icon inside the Animation window, your sprite animation should play (inside the canvas, scene and Game window, hooray!)
Hope this helped! If not, let me know. Cheers, guys <3
